Showing posts with label DIY. Show all posts

Wednesday, May 22, 2019

Food Garden Friday - Bed For Berries


This was a recent project I started for my food garden. I cleaned up the area and created a raised bed with cinder block borders to plant my favored Golden Berries and a tomato variety. I haven't decided yet what to plant in the holes of the cinder blocks, but that will be figured out in the future.


WE'D LOVE TO HEAR FROM YOU
grandmasEFG@gmail.com
PLEASE SUBSCRIBE

Saturday, May 11, 2019

Food Garden Friday - April Showers


Unfortunately my carrot and brussel sprouts are showing no signs of life, but the rest of this area is doing quite well, especially the radish. I've never been a huge fan of radish but I have read about a radish soup which I am ready to research and try.


WE'D LOVE TO HEAR FROM YOU
grandmasEFG@gmail.com
PLEASE SUBSCRIBE

Friday, March 15, 2019

My Fairy Folks - Springtime Palace

The following fairy house was created by Nick from Nevada. He's been making them for a few years and wanted to share this creation with the rest of My Fairy Folks.


This "Springtime Palace" was created for less than $10 using fake flowers, painted wood, gems and seashells.


The base was created from a Chinese checkers board from Goodwill and a silver painted wooden labyrinth found at a garage sale. What a lovely home that is sure to attract a happy fairy.


WE'D LOVE TO HEAR FROM YOU
grandmasEFG@gmail.com
PLEASE SUBSCRIBE

Sunday, October 7, 2018

My Fairy Folks - Ladder as Shelving


I love receiving photos from My Fairy Folks that invite me into their garden and expose me to their DIY projects. Recently I received an email from a reader who was inspired by some of my DIY projects to repurpose this ladder that used to be attached to an above ground pool. It now acts as shelving for her outdoor succulents.


WE'D LOVE TO HEAR FROM YOU
grandmasEFG@gmail.com
PLEASE SUBSCRIBE

Saturday, September 29, 2018

Fairy Garden Class - The Garden That Tells A Story


This large plastic container came complete with drainage. Sometimes, building a story begins at the soil. This container is filled with soil that is low in the front and high in the back - this will help create the illusion of a hill.


This container garden will be a prime example of the "use what you've got" method. I did manage to purchase some flowers for this garden, but hadn't purchased enough ground cover. I decided to use fresh grass clippings to cover the bare soil. Among the grass clippings is some beautiful colored sea glass (as well as some frills of the ground cover Sedum japonicum, nicknamed "Tokyo Sun").


Stout, fluffy garden mums are on either side of the terra cotta saucer which will act as a sturdy base for the focal point. Having low foliage in the front and adding height gradually toward the back adds to the "hill" appearance we began with the soil. The taller, purple flowers are Celosia 'Intenz' and the yellow flower in the rear center is tickseed.


All that's left is to add decor to set the scene. I've added a tall tower at the end of a long, stone path headed off by a thin, golden banner that reads "happily ever after." 


Building a story with the decor you use ins't mandatory but can be very fun. The grass clippings make the royal grounds look unkempt which seems contradictory to this golden banner. The story is slowly coming together.


 I felt like the princess had a sassy facial expression and decided to create an unconventional story with some help.


A sad frog is seen at the window of the princess' tower. He longs to be free but the princess has him and many other frogs locked up. She has townspeople and servants to entertain and wait on the frogs and kisses them every night in hopes one will turn into a prince. One night, with the help of one of the townspeople, this frog was able to escape the tower.


It turns out, that frog actually IS a prince but he did not like the princess so a kiss from her did not transform him. Now, back in his own castle, he is able to transform into his true form. He can live out his days happily, seeking his true love, but not before an extra bit of security.


Ahh, that's better. A big, strong wall to keep that rotten princess at bay. By swapping out some decor, the scene changed!


WE'D LOVE TO HEAR FROM YOU
grandmasEFG@gmail.com
PLEASE SUBSCRIBE

Sunday, September 23, 2018

Gifts for the Garden - September 2018


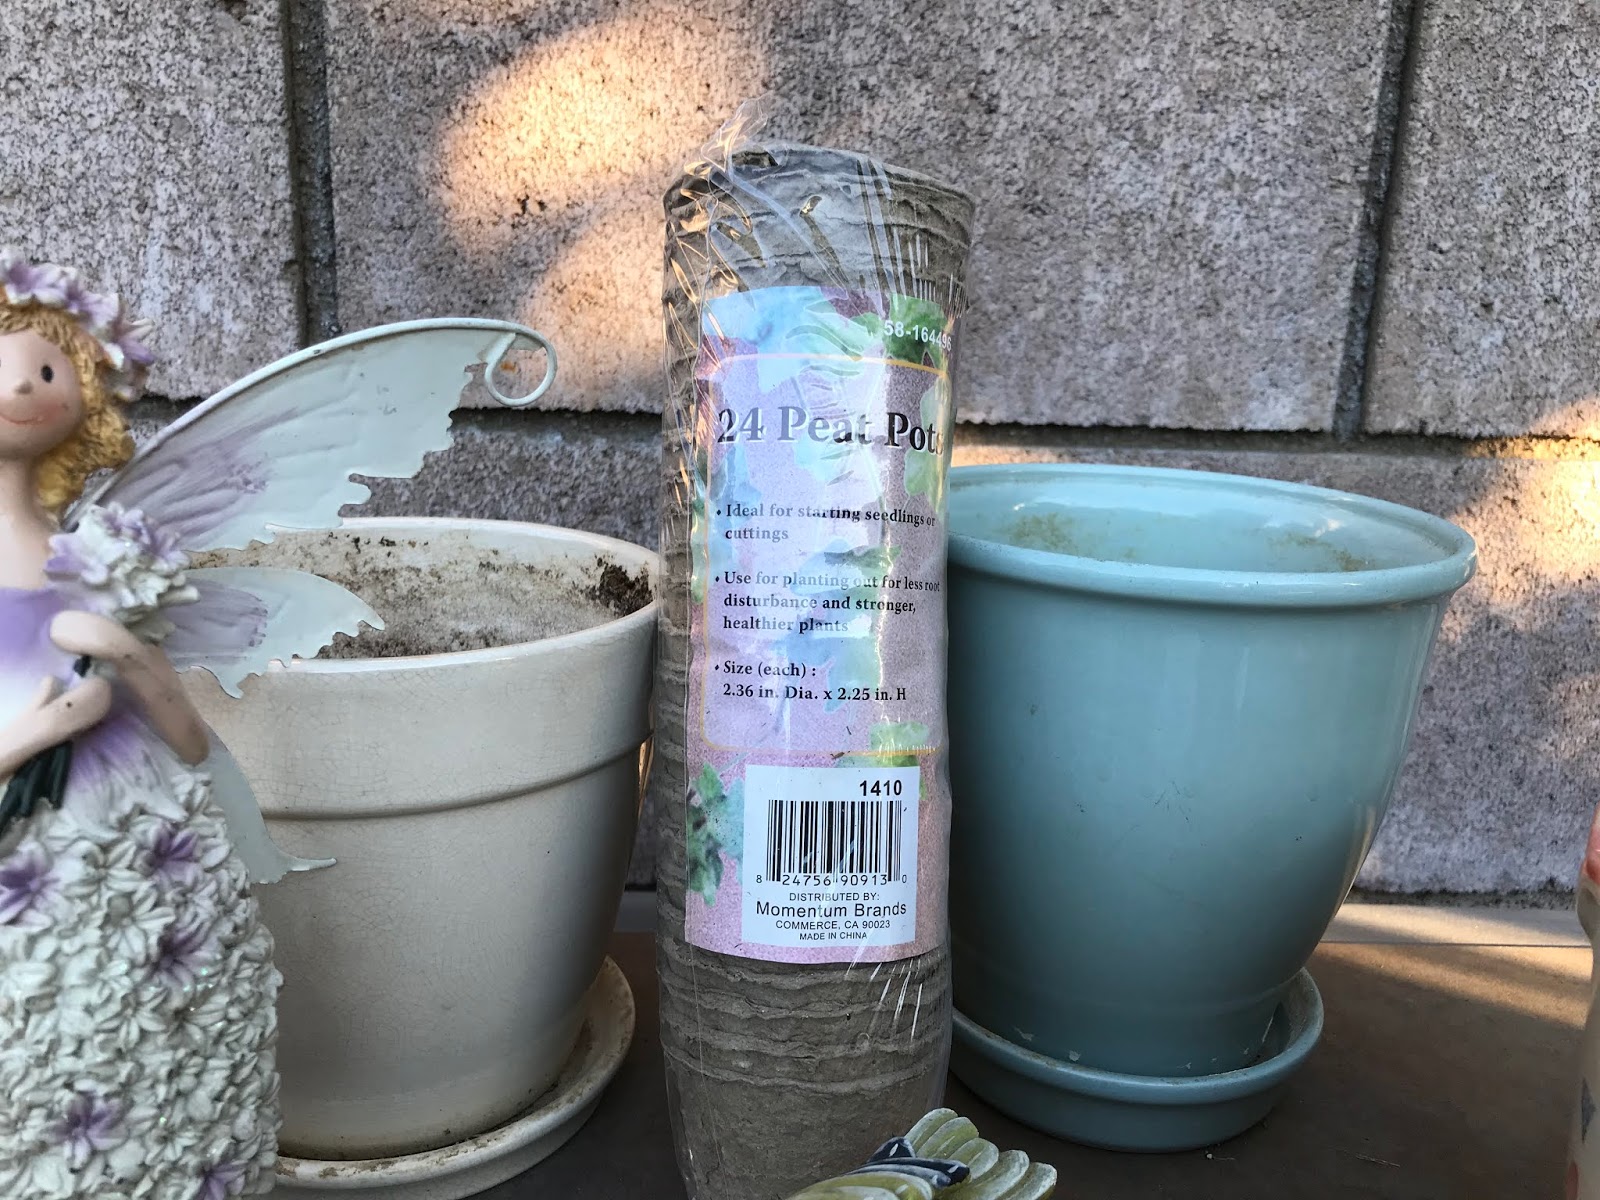
I've received so many gifts for my garden this past month. A few decorations, some containers and some new DIY supplies.


This beautiful ceramic pot is part of a matching set that comes with drainage holes and a saucer, gifted to me by one of My Fairy Folks.


The two containers in the rear also came from one of My Fairy Folks, complete with drainage holes and saucers. The peat pot sleeves come in a pack of 24 and I received 5 packs. Since I have been receiving so many seeds, the follower suggested I pack these with soil and get the seeds started.


I don't have a single-serving coffee machine at my house but one of My Fairy Folks suggested repurposing these plastic cups as small planters (I didn't count how many I received, but I have a small grocery bag full). These won't decompose the way that the peat pots do, but they come with drainage and are reusable.


This tall beauty came to me as a hand-me-down from one of My Fairy Folks. She has been damaged in the past (weak ankles), but I have ways of hiding flaws in re-purposed items.


This cute little prince came from my granddaughter when she spotted him on sale at Jo-Ann. She knows that anytime she finds a little boy fairy, it needs to be added to my collection.


Also from Jo-Ann, this fall-themed decor will find it's way into a scene soon with the new season.


WE'D LOVE TO HEAR FROM YOU
grandmasEFG@gmail.com
PLEASE SUBSCRIBE

Wednesday, September 5, 2018

Illuminate - Color Bursts


Here are my newest garden lights in action. I purchased these on clearance at Walgreens. They were $3.50 each (two strands pictured above) and are battery operated. I do prefer solar light options, but I don't mind having a few battery-powered pieces, especially at clearance price. These lights slowly fade into different colors shown in the video below.


I don't have a specific garden in mind, but they might make good lighting for a July 4 garden. We'll find other uses for them in the meantime. How do you use lights in your garden?

WE'D LOVE TO HEAR FROM YOU
grandmasEFG@gmail.com
PLEASE SUBSCRIBE

Monday, August 27, 2018

Fairy Garden Class - Jade Forest


This drawer was gifted to me recently by one of My Fairy Folks (click here to read the post). I decided to begin working on a jade forest with this container garden.


A large garbage bag lines and protects the wooden drawer that acts as a container garden. I punctured the bag at two corners where it will allow drainage. A layer of small rocks will help the soil drain excess water.


With the potting mix laid in, I carved a divot down the middle to create a path and planned out the jade placement.


After I planted the jade, I decided it was too bare as is and found some extra plants laying around to fill in the empty space.


Besides Jade, I also planted dwarf cup flower up front and Gomphrena is the plant in the rear with the purple blooms that look like berries. I purchased these additions from Home Depot for less than a dollar each.


I decided on a good spot for this container garden and was able to prop it at an angle that will help navigate excess water to my planned drainage points. After cutting off the excess garbage bag and tucked it in, I added a layer of moss and larger rocks (this will help keep moisture in the soil).


Finally I added some small pebbles in the middle to create a path that will act as a beautiful scene for some fairies to enjoy.

WE'D LOVE TO HEAR FROM YOU
grandmasEFG@gmail.com
PLEASE SUBSCRIBE

Wednesday, August 22, 2018

A New Yellow Path


These decorative pavers were purchased around 15 to 20 years ago. Back then, they were blueish-grey stepping stones. As you can see, the grey has worn off, revealing the naked color of the stone. Time for a repaint.


To start, I lay on two coats of white spray paint. I want to make sure the base color is even so that when I cover it with the final color, it will be solid and not patchy.


I finalize these pavers with two coats of bright, yellow paint.


This new path will lead guests past a flower garden (pictured to the right) and end between Fairy Shores and an unnamed area of my garden. Years ago I had looked at these discolored pavers and decided to hand paint them. However, recently I decided I'd waited too long already and went ahead with spray paint. I might still hand paint with accent colors in the future.


WE'D LOVE TO HEAR FROM YOU
grandmasEFG@gmail.com
PLEASE SUBSCRIBE

Friday, August 10, 2018

Gifts for the Garden - August 2018


I received some gifts early this month so I have time to work on some DIY projects! These white drawers are leftover from a kitchen remodel of one of My Fairy Folks. The pull out drawer in front will be turned into a jade garden first. The drawer with 4 compartments to the right will be used for my fairy garden farm. Any suggestions for the final piece (tall drawer in the rear)? I haven't decided what to do with it yet. Have you done any DIY projects lately? I'd love to share them on the blog.


This lovely wicker basket was found in the trash at work. I inspected it, found nothing wrong with it and couldn't believe someone would just throw it out! Instead of turning it into a fairy garden and risk damaging it, I decided to use it as my harvest basket! I've been using plastic bags or plastic bowls from my kitchen, but this thing is the perfect size (already tested) to gather more than a handful of garden yield.

WE'D LOVE TO HEAR FROM YOU
grandmasEFG@gmail.com
PLEASE SUBSCRIBE

Wednesday, July 18, 2018

My Fairy Folks - Path of Success

I received a message recently from one of My Fairy Folks. In this message she explained how she was motivated based on my Garden A Day Challenge to do something in her garden each day of July. She settled on cleaning up an overgrown path in her yard. She counted the pavers and divided the work equally throughout the month. The foliage was thick and covered the walkway making the pavers not visible. 


The pavers shown above were once obstructed from view by dymondia margaretae, a ground coverage plant that is more commonly known as "Silver Carpet." According to Gardenia.net, this plant sprouts small, yellow flowers in the summer and is drought tolerant but will grow quickly when watered. A benefit of having Silver Carpet in your yard is that it is a heart plant with deep roots that tolerates foot traffic well and also grows to be a thick mat that prevents weeds from sprouting.

"I never would have got the project finished if I hadn't divided up the work one day at a time because of my bad knees." 

Thank you for sharing your experience with us and I'm so glad I was able to inspire at least one person out there! If you have any projects you've completed that were inspired by this blog, please feel free to send me information so I can feature it during this monthly spotlight.

WE'D LOVE TO HEAR FROM YOU
grandmasEFG@gmail.com
PLEASE SUBSCRIBE

Thursday, June 28, 2018

Gifts for the Garden - June 2018


Lets take a look at all the lovely gifts I received from My Fairy Folks this month!

This planter stand and the bench were given to me by one of my oldest followers. The tiny Garden Gnome book came from a new follower - hello and welcome! This DIY door was spotted by one of My Fairy Folks in Los Angeles during a shopping trip and it made her think of me. How wonderful to know that I'm in your thoughts when you're out and about! The trail sign and pen came from one of my granddaughters. The pen is great for taking notes on paper and my tablet since it has a soft tip for touch screens.


WE'D LOVE TO HEAR FROM YOU
grandmasEFG@gmail.com
PLEASE SUBSCRIBE

Tuesday, June 26, 2018

Painting and Prepping for a New Look


I'd like to share with My Fairy Folks a story about how these two characters came to look so full of life.


In late 2017 I found this male fairy at Parkview Nursery in Riverside (this photo was pulled from a different post but shows the fairy best). Unfortunately his face was a little expressionless so I would try not to get too close in photos. A few months ago I came across a similar male fairy in a canoe at the same nursery and decided to purchase it. This wouldn't be the first time I've used two different figurines to play the role of the same character; I've also done this with some Disney character miniatures.


This gnome on a mushroom was gifted to me earlier this year by one of My Fairy Folks. I could tell that he was in need of a repaint. When I spotted a blue shirt, red hat gnome in a canoe recently, I knew this was a perfect opportunity for a canoe race scene. I had two characters that would be represented by four miniatures. But first, I needed to get new paint on the pieces.


In the few years I've been doing this fairy garden blog, I've been able to meet some very talented folks and am happy to call most of them My Fairy Folks. I reached out to one in particular who I was told does wonderful work with painting miniatures. I asked if she could add a face to my two leading characters and she was happy to help. When they were returned to me, I was very impressed with how they came out! 


Not only did she add personality to their blank faces, but she also repainted texture and clothes so that each character truly looked like their match. While the boy fairy was a bit easier since they came from the same miniature designer, the gnome required a bit more effort and finesse. I'm so very grateful for her work and friendship. I am pleased to know that there are people out there that stand behind giving new life to old things.

WE'D LOVE TO HEAR FROM YOU
grandmasEFG@gmail.com
PLEASE SUBSCRIBE