Here are the items I purchased recently at Hobby Lobby. See, I didn't go overboard. I told you I have self control!
Have you ever tried to find a little girl gnome? It's almost as hard as finding male fairies, but voila, here she is! Also, I have no idea where to put this chair but I knew I needed it.
This miniature park bench looks overgrown with ivy, perfect for an overgrown looking container garden.
Can you guess where these beautiful mermaids will go in my garden? I'm sure you've correctly guessed Fairy Shores. You'll see them again late Spring.
A week after this shopping trip (yay, payday!) I went back to Hobby Lobby and purchased the pink trailer that I plan to use in the upcoming Valentine's Day themed garden. Keep an eye out! Do you have any plans for a Valentine's Day themed garden? Send me some pictures and a description and I can post it here on my blog.
Hobby Lobby is widely known for their low prices but did you know they offer a good selection of Fairy Garden items? I have found that, for the most part, Hobby Lobby has lower prices and better quality than similar stores (like Jo-Ann and Michael's). That sounds great, but there is a downside; the availability of fairy garden supplies drastically reduces outside the months of January through April.
These adorable, pink trailers were too cute to pass up and might be hard to find considering I grabbed up the last one at my local Hobby Lobby.
A birdhouse can be a cute use for a fairy dwelling, especially when they're 40% off.
You might be surprised to see that my business spotlight this month is Hobby Lobby, considering I tend to feature local nurseries, but I did make a purchase and felt it needed some explaining. Yes, I like to support local and small business but I also like to save money.
A wide selection of houses, buildings and miniature decor.
Adorable miniature decor including fencing, doors, gnomes and more!
There are quite a few kits available for purchase to make themed fairy gardens.
These wire baskets have deep discounts and are great for container gardens, especially with overflowing flora.
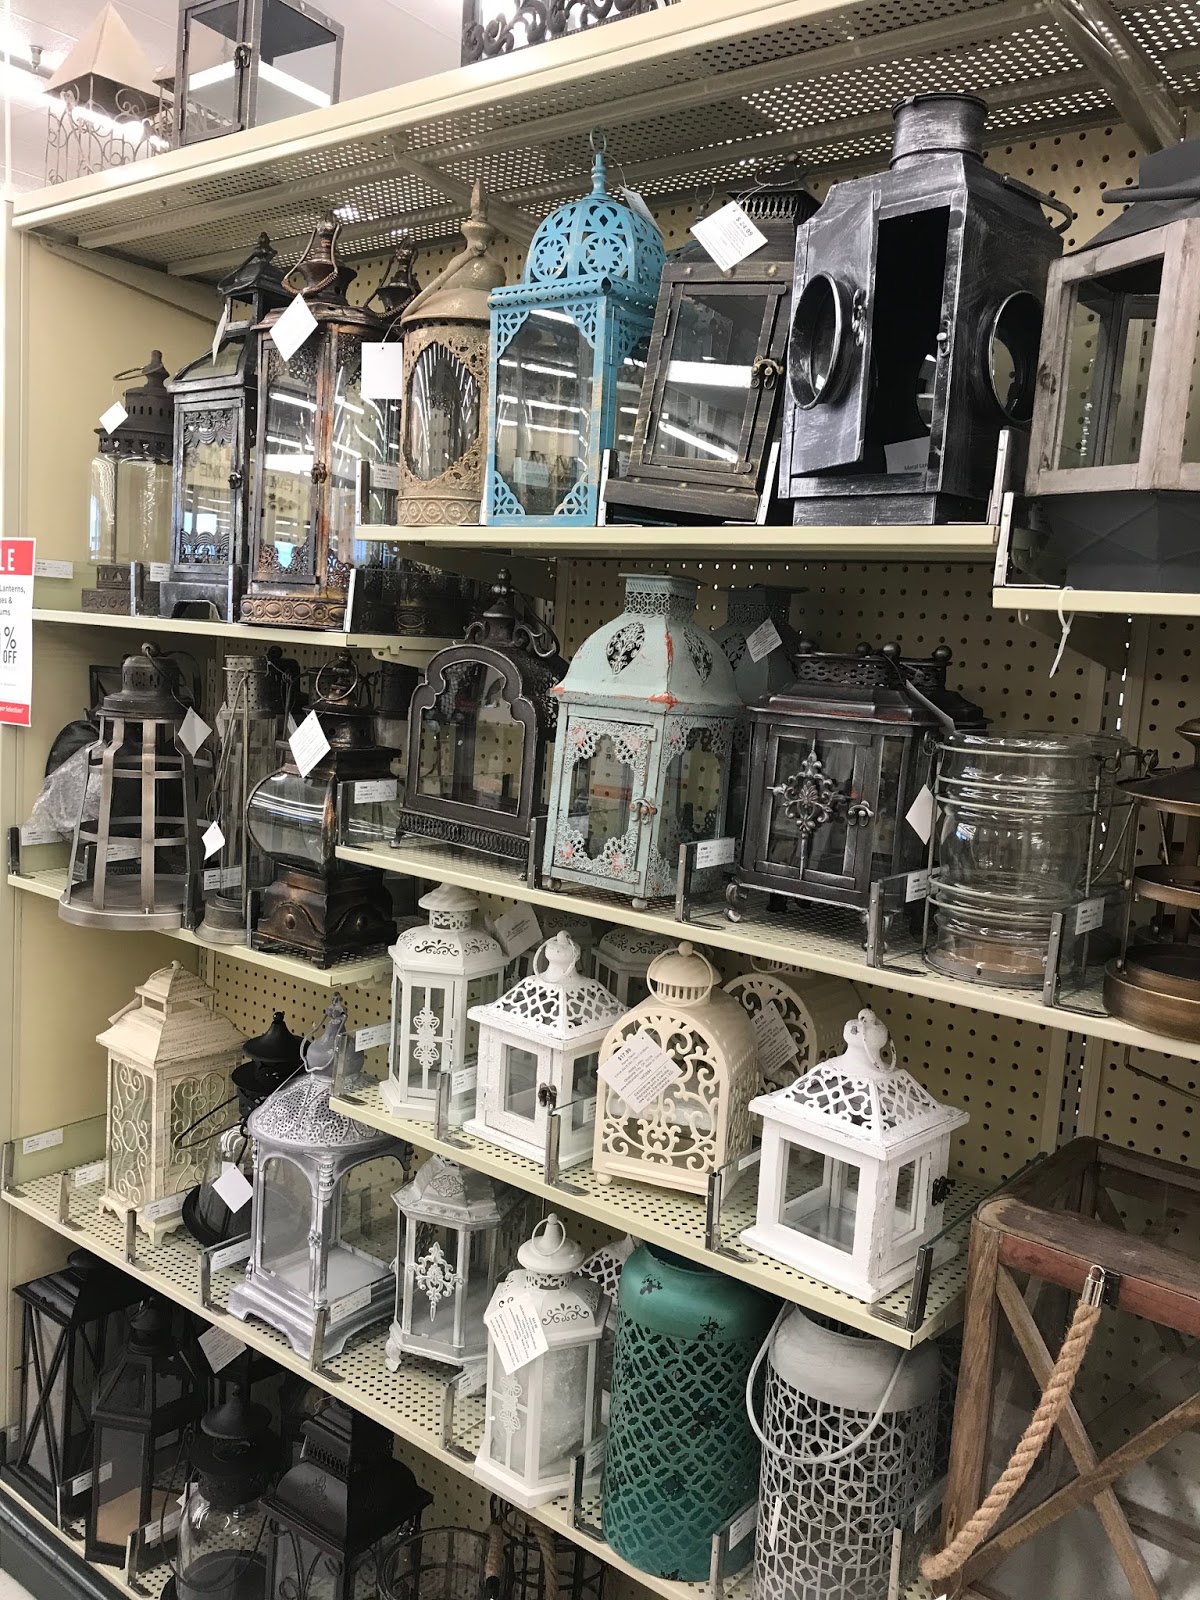
These lanterns were 50% off, and while most might see them as home decor, I see them as unique fairy scenes. The fact that these allow viewing from most angles gives you unique opportunities to get creative!
This cobblestone, two-story home was calling out to me with the oversized mushrooms and welcome mat.
This uniquely shaped home could very well belong to an outgoing gnome, set between two bridges.
I managed to stop myself from buying everything my heart desired and will show you in my next post all the lovely things I brought home.
This month's Fairy Garden Class is taking a step away from the winter theme and utilizing a variety of Fern, including the adventurous asparagus fern.
For this project I've used a 12" diameter Terra-cotta pot with drainage holes, lined with coffee filters. Coffee filters are a cheaper alternative and still biodegradable which keeps the potting soil from escaping the drainage holes while still allowing the water to drain. You can use any type of container you wish but make sure it's not shallow because ferns like to stretch their roots. I know that in a few months I will need to transplant these ferns elsewhere to give them more growth. The purpose of this particular container garden is to be entered into a garden show. And here's an extra safety note: don't fill your pot with soil until it's in the location it will remain for the next few months or you have a muscular helper (these pots can get very heavy)!
For this particular project, I needed the smallest ferns I could find so that I could fit a variety in one pot. I found what I was looking for at Lowe's Home Improvement for under $20. It can sometimes be difficult to find small enough plants for a miniature garden at large stores, but I was lucky enough to find what I needed in this trip.
I decided a layout and planted each one around the outside, allowing space for a central focus piece.
I was able to take some thin branches from a nearby tree to create an eye-catching arch to frame the focus of this garden. I was so excited to find asparagus fern during my trip and knew I needed to use it on the arch. Asparagus fern is unique because unlike most other fern that are bushy, it likes to travel, growing up and out to anything it can reach! I gently wrapped the tendrils around my makeshift arch and used zip ties to secure it. In a few weeks the fern will gain some girth and be stable enough to hold the arch without the ties.
After adding finishing touches that include colorful rocks, gravel and driftwood, I made Bridget the focal point. It looks like she has been traveling for some time and found a nice place to rest and take in the lovely scenery.
I hope this tutorial has been helpful. If you have any questions or would like to share your container garden photos with us, please leave a comment or email me - I love reading from My Fairy Folks.
Last night while Mr. Peanut went out to potty before bed, he took off around the corner again. This time I didn't question it and followed him, wondering if the snowmen were still here. This time, I heard music and saw colorful lights.
Two ice reindeer were glowing near the area we found the snowmen just a few nights before. Their colors and bodies shifted gently to the music. What a lovely display. Apparently fairy magic can even make ice come to life!
Mr. Peanut and I went back inside. It's wonderful to have so many lovely surprises right in my back yard.
Recently, a new development took place here at Grandma's Enchanted Fairy Garden. I took Mr. Peanut out to go potty before we went to bed as we usually do, but just before we were ready to go back inside, Mr. Peanut stopped and looked at me. "What?" I asked. He looked in the direction of my garden, his ears perked and his nose sniffing the air. He quickly left the front porch and head toward the back.
"Mr. Peanut, where are you going!?" I followed his wagging tail around the corner and looked in the direction he was heading. I saw a faint light that I hadn't noticed before. Could this be what Mr. Peanut sensed? I moved closer and realized there was a sound coming from the direction as well. Maybe this is what Mr. Peanut heard that caught his attention. I got closer to investigate.
Mr. Peanut was very interested but very quiet and sat calmly until I reached the light. I realized the sounds I heard were laughter! Two snowmen were swinging all alone but seemed very joyful. "Wheee!" said the young one on the swing. "Not too high," said the other in a careful tone. They seemed to be a father and son. I listened as they sang a Christmas song together and applauded lightly when they finished before introducing myself.
"Oh how wonderful that we have this chance to meet," said the father. "It's been quite warm during the day when I've been told you visit often so I was hoping we would happen upon you one night." I smiled. "You can thank Mr. Peanut here for that. I was ready to go back inside but he heard your laughter and I followed him over here. I'm happy to meet you." "My son and I would like to thank you for making such a wonderful place for us to swing by on our travels." We all laughed at his pun and sang some songs together before Mr. Peanut and I called it a night.
For Christmas I received this Glow-in-the-Dark Terrarium kit from one of my grand-daughters (among some other wonderful Fairy Garden items). I had some free time recently and am here to report how this kit worked out.
The listed contents for this kit.
Here are the contents of the kit all laid out, excluding the glow-in-the-dark stickers (which I decided not to use on my kit so that I could see everything better). The lid was definitely my favorite part of this kit. Unfortunately the amount of glow-in-the-dark sand provided does not measure up with what is shown on the box. I was sad to learn that the sand is the only thing in this kit that glows and it ended up being barely visible (I tested the stickers and they gave a vague glow as well).
I actually decided to add extra white pebbles since the kit's supply was so small. The blue pebbles were skimpy as well and only on this side of the jar. I also placed the glow sand on the same side because there wasn't even enough to have a noticeable layer all the way around!
I added the "grass" that came with the kit (which is made to look like moss but I honestly don't know what it is made of). The "grass" that came with the kit was in abundance so I only used about 1/4 of the supply and it was so fine that it was hard to keep it from seeping through the layer of pebbles. I would suggest you put a layer of sand between the pebbles and the grass to prevent it from seeping down. But I will say that this grass allowed the figurines to remain stable, whereas using moss might allow them to shift.
Here's a picture I took of the completed kit in my bathroom. I tried to take a picture outside at night, but it wasn't visibly glowing and I could only see the sand glow when I was in complete darkness. Realize that this kit did come with glow-in-the-dark stickers which might make it look better at night, but I think it'd block the view of the contents during the day. If you get this kit, I'd suggest buying extra glow-in-the-dark sand. Overall, I think this is an easy kit for young children but could be made better with, at the least, more glow-in-the-dark sand. Hey, maybe even get some glow-in-the-dark paint and put it on the fairy wings and the horse body. It's your kit, get creative.
You can't imagine how hard it was to capture this picture. Drink it in.
Our friends from Los Angeles, California are back with a fairy offering. This time Willow and little Mina have shared with us their New Year tradition.
Top, clockwise: Steak and gravy, Black eyed peas pot licker, oatmeal cookie, cornbread and butter, corn, honey glazed carrots, and steamed broccoli and cauliflower.
Willow writes, "in the South, we eat black-eyed peas on New Years day to bring good luck for the year. Being from southern roots, I made my black-eyed peas 'pot licker' style." I'd never heard of pot licker before, so I looked it up and found that it is a term not often used outside of Southern America and means that something is made with pork fat and is so yummy that you want to lick the pot clean! I'm so jealous of the fairies that got to dig in to this feast!
Mina placed the plate of food in the area of their yard they have dedicated for fairies. They leave the food out overnight so that any hungry fairy can come as they wish for a lovely snack.
Thank you to all of My Fairy Folks that contributed throughout the holidays! I hope you all have a wonderful year and continue to check in here, especially in the next few months when we'll have a special announcement you'll want to know about.